Expert skills from the backcountry instructors, guides, and avalanche professionals of Bluebird Backcountry, Colorado’s only human-powered ski area.

How to Choose a Backcountry Ski Setup

So you’ve been backcountry skiing a few times and you’re ready to choose a backcountry ski setup. Making the leap is one of the most exciting parts of getting started in backcountry skiing. But it can also be pretty overwhelming.

Camber or rocker? Paulownia or poplar? Fiberglass or carbon? There are so many skis out there (and so many friends with really strong opinions). If you find yourself leaving gear conversations with your head spinning like a kid throwing 360s at the terrain park, you’re not alone.

To demystify the process and help you choose a backcountry ski setup that works for you, we talked to Andy Merriman, who’s been involved in engineering and designing skis for nearly 17 years. As Black Diamond’s ski category manager and an experienced backcountry skier himself, he’s got some insider tips for picking the perfect setup.

1. Think of your backcountry ski setup as an integrated system.

Think of your boots, bindings, skins, and skis not as four distinct pieces of gear but as a single system designed to work together, Merriman says. Different bindings work better with different boots, and some skins work best with certain skis. Before you buy something new, ask an expert how it will pair with what you’ve already got.

Your boots, bindings, skis, and skins should work in harmony. Photo: Justin Wilhelm

2. Pick a mid-weight ski.

“Weight isn’t everything, but it does matter,” Merriman says. Resort skis, which are often made of heavier materials like fiberglass and poplar wood, handle well on the downhill, but the weight will leave you huffing on the uphills. Lighter skis, on the other hand, are dreamy while touring, but they can result in a bouncier, more unstable ride. Plus, the lighter the ski, the less durable it will be.

Merriman recommends finding a ski that hits the middle of the weight spectrum by using a mix of materials like fiberglass and carbon fiber, and lighter woods like paulownia or balsam. (Around 5.5 to 8 pounds is a good ballpark range, though your ideal ski weight will vary depending on your height and weight.)

3. Look for a 95- to 105-mm waist.

“When it comes to the width of the ski, the snow that you ski is obviously a factor,” Merriman explains. “In places where they get a ton of snow, you’ll see people skiing with 115mm underfoot. But most of the time, 95 to 105 is that sweet spot for a backcountry ski. “Whenever I travel to ski, unless I have a specific objective, I take a Helio Carbon 104,” Merriman says. “I would say that for 90% of what I go out to ski, the Helio Carbon 104 is perfect.”

4. Stick with the length you’re used to.

Sure, shorter skis can be helpful when it comes to making kick turns or maneuvering in tight trees, but they provide less float when it comes to powder, Merriman says. At the end of the day, “I wouldn’t think there’s anything different about selecting a ski length for the backcountry than a resort.” Stick with the length you’re used to skiing.

A waist between 95 and 105mm is the sweet spot for most backcountry skiing.

5. Consider your goals.

When you choose a backcountry ski setup, it’s important to consider your actual plans for use. Are you going all in on backcountry skiing? A lighter-weight, backcountry-specific ski (like the Helio Carbon 104 Merriman likes) could be the best option for you. Want to split your time between the resorts and the backcountry? Pick a ski designed to do both. “The Helio Recon is a great option,” Merriman says. “It’s got a poplar core and it’s pretty light, but it’s made with fiberglass instead of all carbon. It’s a really solid in-bounds and out-of-bounds ski.” Bonus: It’s also a little less expensive.

6. Pick a ski that’s intuitive to use.

Aggressive, hard-charging skis may sound fancy, but stiff skis make it harder to initiate turns—which is already tough enough in variable backcountry snow. If you’re new to backcountry skiing, look for a ski that’s a little softer with a shorter turn radius. (Again, the Helio Carbon ticks this box. It also has a full ABS sidewall, which means great edge stability for a really intuitive feel.)

7. Look for traditional camber and early-rise tip.

The best ski shape for you totally depends on your personal preferences and style. However, Merriman says that some of the most popular backcountry skis are those with a traditional camber (that means they’re arched in the middle) and an early-rise tip (they scoop upward at the front to give you a lift over powder.)

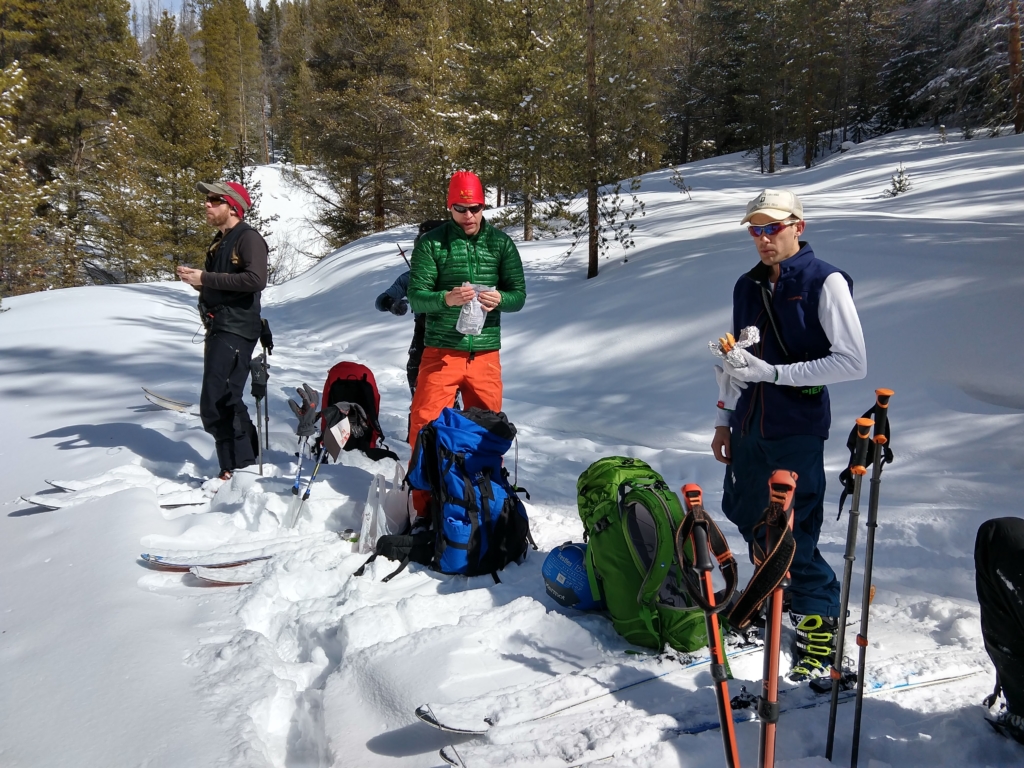
Pick a ski that matches your goals. In this case: as many backcountry laps as possible.

8. Find boots that fit.

The most important qualities in a boot: They keep your feet warm, and they fit you well. We recommend going to a professional bootfitter or reputable shop when you’re working to choose a backcountry ski setup. There, you can have your boots professionally fitted and your liners molded to your feet if need be.

9. Don’t overthink your bindings.

After a pricey ski purchase, it can be tempting to skimp on bindings. But the last thing you want when you’re transitioning on a frigid, windy ridge is having a binding freeze, get stuck, or break. Bindings are a crucial part of a backcountry ski setup. It pays to buy a pair that’s high quality, and that works well with your boot.

For first-time backcountry skiers, Merriman recommends keeping it simple. Like skis, look for something that’s in the mid-range in terms of weight. Then, “make sure it has the features you’re looking for,” Merriman says. For new backcountry skiers, brakes and two or three levels of heel riser settings are usually the way to go, he adds.

10. Test-drive as much gear as you can.

The longer you backcountry ski, the better idea you’ll have of what gear you like and don’t like. Before you choose a backcountry ski setup, it can be helpful to try out as many models as you can, says Merriman. (Bluebird Backcountry offers rentals of boots, skins, splitboards, and backcountry skis—including the Helio Carbon.)

Bluebird’s rental fleet, at your service. Photo: Erik Lambert

How to Layer for Backcountry Skiing and Splitboarding

Smart clothing choices are important whenever you venture into the wilderness, but it’s especially important to layer for backcountry skiing and splitboarding. After all, it’s hard to focus on learning and having fun when you’re cold or damp.

As a backcountry-only ski area (there are no lifts, but plenty of warming huts!), Bluebird Backcountry is a great place to dial in your layering system in a more controlled environment. Don’t know where to start? Here are our tips to layer for backcountry skiing and splitboarding.

Two backcountry skiers carry their skis across a bridge in the snow

Layering is the secret to staying warm and dry while working hard to earn those turns. Photo: Big Agnes

What is Layering?

At a ski resort, you dress for one goal: stay warm. Well, maybe two goals: stay warm, and keep the snow out of your pants. Layering for backcountry skiing and splitboarding is a little more complicated.

In the backcountry, there’s a lot more variation in activity level. It’s easy to overheat and break a sweat when you’re skinning uphill. In the winter, sweating is a bad thing: Moisture saps heat like nothing else. Sweat too much, and you could become too chilled to finish out your day.

The secret to a comfortable backcountry tour is layering, or wearing lots of thin items of clothing instead of one thick winter coat. That way, you can add and subtract insulation to maintain the perfect temperature—not too hot, and not too cold.

Three backcountry skiers gather around a person in a sleeping bag and discuss layering for backcountry skiing

Bluebird instructors teach the principles of layering to prevent (and treat) hypothermia in a recent clinic. Photo: Justin Wilhelm

7 Fundamentals to Layer for Backcountry Skiing and Splitboarding

1. Avoid Cotton Clothing.

Cotton traps moisture, which pulls heat away from your skin. Wool and synthetic base layers, on the other hand, retain warmth even when wet.

2. Start Cold.

As soon as you start skinning, you heat up. It can be tough to stop soon enough to drop a layer before you break a sweat. Take off your jacket before you begin your tour—the goal is to feel just a little chilly when you start.

3. Make Micro-adjustments.

Bring a warm hat (we like knit beanies that are easy to stuff into a pocket), a neck gaiter, and gloves. Add or subtract these items to adjust your temperature without stopping.

4. Master Venting.

For touring, we love jackets with full zippers, like the Big Agnes Smokin’ Axle Jacket, and ski-touring pants with full-side zips. Unzipping is another great way to make a micro-adjustment and dump heat on the go.

5. Keep it Breathable

Airflow keeps you from sweating, which is why we often leave our hardshell jackets in our packs when we’re moving uphill. Softshell fabrics and breathable layers, like a Primaloft vest, insulate without getting clammy or damp.

6. Bring a Crisis Puffy

Layering for backcountry skiing and splitboarding means being prepared for sunny tours and cold transitions alike. As soon as you stop, put on a big puffy jacket to keep warm while ripping skins above treeline. (Pro tip: Down insulation tends to be warmer and more packable than synthetic insulation. It doesn’t stay warm when wet, but it’s a great choice for an emergency layer.)

7. Prepare for the Elements

Your insulated layers only do so much if the snow is dumping or there’s a hard wind blowing. Always bring goggles, windproof layers, and waterproof gloves just in case.

A backcountry skier wears an insulated jacket while ripping skins

When it’s time to transition, layer up as soon as you stop. It’s easier to stay warm than get warm. Photo: Big Agnes

What to Wear: A Sample System to Layer for Backcountry Skiing and Splitboarding

On the bottom:

  • Thin wool base layer
  • Softshell touring pants or hardshell pants with full side zips
  • An insulated skirt or other bonus layer for emergencies

On the top:

  • Thin wool T-shirt
  • Thin long-sleeve quarter-zip
  • Lightweight insulated vest
  • Fleece or synthetic midlayer (The Bluebird staff all use the Big Agnes Barrows Jacket, which offers great balance between breathability and warmth retention. Our love affair with this jacket is a big reason that Big Agnes is Bluebird’s official insulated apparel sponsor.)
  • Big puffy jacket
  • Hardshell jacket

On your hands and feet

  • Lightweight gloves for touring
  • Warm, waterproof gloves for going downhill
  • Warm ski socks
  • AT boots

On your head:

  • Sunglasses and sunhat for touring
  • Helmet and goggles for skiing

Want a full packing list? Check out our ultimate Bluebird gear checklist.

Two backcountry skiers with Big Agnes jackets perform a beacon check

Bring a big puffy (like the Big Agnes Shovelhead jacket, left) and a lighter-weight jacket (like the Big Agnes Barrows jacket, right) to adjust your temperature whether you’re working hard or standing still. Photo: Justin Wilhelm

What Gear Do I Need to Come to Bluebird Backcountry?

There are ski patrollers but no lifts? Gear rentals but no heated cafeterias? As the first backcountry-only ski area in the US, Bluebird Backcountry kind of created its own category of outdoor adventure zone. So, if you have some questions on what exactly you need to bring to ski or ride at Bluebird, you’re not alone.

To help you prepare, we created the ultimate Bluebird Backcountry packing list.


Opt for a 25-35 liter pack with a good hipbelt. How else are you going to carry all those dog treats? Photo: Kathryn Ciamaichelo

A Good Backpack

Your packing list starts with a good backpack. Backcountry safety is all about winter self-sufficiency, and that means having a system to carry the essentials with you. We recommend a pack with a wide, sturdy hipbelt to take the load and keep your shoulders from getting sore. A good hiking pack will do, but most backcountry skiers and splitboarders strongly prefer a backcountry touring pack with dedicated compartments for avalanche gear.

  • A 25- to 35-liter pack

Avalanche Safety Equipment

Bluebird Backcountry is patrolled by some of the best snow safety experts in the biz. We close slopes that we evaluate to have high avalanche risk. However, Bluebird still sits somewhere between resorts and wilderness on the spectrum of avalanche safety. Whenever there’s even the slightest concern about snow conditions, it’s best practice to bring a full avy safety kit. To ski or ride at Bluebird, you must bring the following gear (avalanche safety gear is also available for rent at our base area):

  • Avalanche beacon (required)
  • Avalanche probe (required)
  • Avalanche shovel (required)

Avalanche beacon, probe, and shovel are required at Bluebird. Plus you’ll need them to win cool prizes in our rescue drill contests! Photo: Doug McLennan

The Big Essentials

Now for the fun stuff. You can rent the following gear at Bluebird or bring your own.

  • Boots (make sure any ski boots have a walk mode; regular snowboard boots are compatible with splitboard bindings)
  • Skis or splitboard with AT bindings
  • Collapsible poles
  • Skins

Warm Layers

A big part of having fun and learning effectively in the backcountry is knowing how to stay comfortable in cold and variable weather. That all comes down to smart layering. We recommend wearing and/or packing the following.

  • Wool or synthetic baselayer bottoms
  • Wool or synthetic baselayer top
  • Ski socks
  • Wool or synthetic undies
  • Neck gaiter
  • Warm hat
  • Lightweight touring gloves
  • Warm mittens or downhill gloves
  • Wool or synthetic midlayer
  • Softshell pants (or hardshell pants with zippers for venting)
  • A waterproof shell jacket
  • A warm puffy jacket for stops and emergencies
  • An insulated vest or lightweight puffy

A good hardshell jacket, like the Black Diamond Liquid Point Shell, pictured, blocks wind and keeps out snow while you shred. Photo: Justin Wilhelm

Other Essentials

Stay comfortable over a full day outdoors by packing these important odds and ends.

  • Face mask
  • Sunhat
  • Chapstick
  • Sunglasses
  • Sunscreen
  • Goggles

Food and Water

Bluebird Backcountry has lots of great food offerings at our base area this year. Think giant s’mores, chili, and breakfast burritos. However, it’s always good practice to throw a few things in your pack to keep you fueled on the skintrack. (If you forget, you can stop by the Bluebird Base Area, where we offer snacks from local brands like Patter Bars, Kate’s Real Food Bars, Upqua Oats, Mike’s Mighty Ramen, and Honeystinger.) We also recommend bringing warm beverages—they make it easier to stay hydrated in the cold.

Fuel up between runs with giant s’mores at the Bluebird base area. Photo: Doug McLennan

Emergency Safety Gear

We also recommend getting into the habit of packing these backcountry essentials, too, which will give you an extra layer of security in the true backcountry. (However, thanks to our staff of trained patrollers, this gear is less critical at Bluebird Backcountry and isn’t required.)

  • Extra batteries for your beacon
  • Headlamp
  • First-aid kit
  • Repair kit
  • Satellite beacon (PLB)
  • Backcountry radios
  • Emergency shelter or safety blanket
  • Spare socks
  • Spare gloves
  • A helmet (not required at Bluebird, but recommended)

Softshell pants, lightweight gloves, and a synthetic midlayer are usually perfect for skinning in Colorado’s typical dry snow conditions. Photo: Doug McLennan


How to Camp in Your Car in Winter

Learn to camp in your car in winter, and you’ll be putting in first tracks all season long.

This year at Bluebird Backcountry, we’re excited to announce that we’re allowing slopeside camping in our parking lot for just $25 per night. (Season passes come with five nights free.)

Camping in your car in winter can be a great way to save money and eliminate your mountain commute. However, you’ll need a vehicle outfitted for four-season camping to do it. Here are our tips for ensuring a safe and cozy night.


All you need to camp in your car in winter is the right setup and a little fourth-season savvy.

Safety Considerations for Sleeping in Your Car

At Bluebird Backcountry, we’re all about safety. We can’t spend all day raving about beacon checks and helmets and then leave you out in the cold without a little risk-management talk.

So, before you camp in your car in winter, ask yourself these questions.

How Cold is Too Cold to Sleep in My Car?

This depends on your gear and your setup, but here’s some conventional wisdom to prevent sleepless nights (and hypothermia).

Trucks and SUVs

Think of your car like you would a tent. If you have a 15°F sleeping bag, your lower limit for sleeping in a car in winter should be around 15°F.

Cargo Vans

A well-insulated van without a heater is generally comfortable down to around 0°F with a good mattress, a large down comforter, and one person. With two people (twice the body heat) it’s usually comfortable to around -10°F.

Campers and RVs

Vans and campers with propane or electric heaters can be comfortable in any weather. (If you don’t have your own four-season camper, you can rent one from Native Campervans or Escape Campervans in Denver, or A-Lodge in Boulder.)

Do I Have a Backup Plan?

Even die-hard ski bums have to call in a favor when the nights get really cold. If you’re new to camping in your car in winter, have a backup plan. We recommend keeping in mind a nearby hotel you know is open late. It’s also smart to have a space blanket, extra warm layers, and a full gas tank—that way you can run the car heater for a few minutes if you wake up cold.

Of course, the best way to ensure a cozy evening is to prepare your car the right way.


A camper trailer parked in the snow demonstrates how effective a propane heating system can be.
An RV or camper trailer with built-in heating is a great way to ensure four-season comfort.

Outfit Your Car for Winter Camping

Everyone has a different setup, but these basics will get you cozy in no time.

1. Fold down your back seats.

Make sure your seats fold down fully and lay flat enough to sleep on.

2. Add insulation.

Cars lose most of their heat through their windows. Trap warmth by putting a thick reflective sun shield in your front windshield, and cutting insets out of Reflectix wrap (available at most hardware stores) for your other windows. Push the insets into the windows before getting ready for bed.


A couple eats dinner by their car, which is insulated with silver Reflectix window insets.
Window insulation is a must to camp in your car in winter. (Twinkle lights are a close second.)


3. Throw in a mattress.

Car seats aren’t great insulators. For camping in your car, we recommend a 6- to 8-inch-thick memory foam mattress, which you can cut down to size with a bread knife. They’re also easy to fold up for storage. A sleeping pad rated for winter camping will also work. (Pro tip: Stack a foam sleeping pad on top of an inflatable to up the insulation value.)

4. Build your bedding.

Grab your pillows and choose the right blankets. We recommend using a sleeping bag rated to at least 0°F, or colder if you want to brave below-zero temps. A few thick down comforters can also work for temperatures around 0°F.


A sleeping bag and sleeping pad provide warmth in the back of an SUV.
A warm sleeping bag and a little pop-up organization go a long way. Photo: Miki Yoshihito


5. Pick the right pajamas.

Your skiing baselayers make great winter PJs. Most of us who frequently sleep in a car also wear a hat and thick, loose socks. (Snug-fitting ski socks can reduce your circulation while you sleep, leaving you with cold toes.)

6. Heat it up.

Before bed, blast the car’s heater so you can crawl into warm blankets. While you wait, we recommend eating a bedtime snack and brushing your teeth. Maybe even floss. (We’re all about that dental hygiene.) Be sure to turn off the car before sleep.

7. Crack your windows.

Cars can get stuffy, even in winter. We recommend cracking your front windows just an inch or so to promote air flow.

8. Dream of fresh pow.

And in the morning, shred.


A woman smiles in the doorway of a van amid several inches of snowfall.
Car-camping gives you front-row seats to classic Colorado powder days.

How to Make This Your Best Season Yet

This summer, it’s time to commit to something you can really get excited about: Have more fun on skis or a board. At Bluebird, this is our favorite resolution because it makes improvement almost inevitable. Resolve to have more fun, and you’re all but guaranteed to improve your skiing and riding skills, up your experience level, and get out more this season.

We polled the Bluebird Backcountry crew—a stacked team of lifelong skiers, splitboarders, and powder hounds—for their best tips. Here are our favorites for having more fun on the slopes and making 2021/22 your best year of skiing or riding yet.


a backcountry skier on dawn patrol looks at sunrise through snowy trees

Sunrise is better when there’s no office window in the way. Photo: Holly Mandarich via Unsplash

1. Play Hooky on a Powder Day.

The best way to have more fun on skis or a board? Make it feel just a little more badass. “Play hooky from work at least once,” recommends Bluebird team member and photographer Doug McLennan. Get in the habit of tracking upcoming storms on a weather app like OpenSnow, and treat yourself to a sick day the next time your favorite spots get a few inches of fresh.

2. Up Your Snack Game.

You’re a grownup now, and it’s time to start snacking like one. “Stop bringing along that same stale Clif bar that’s been getting smushed in the brain of your pack for the last 3 seasons,” says Bluebird’s brand and marketing guru Emma Walker. “Bring food you’ll actually eat (and enjoy), and you’ll be amazed how much better your days on the skintrack feel!” Need some suggestions? Check out our list of the all-time best backcountry touring snacks.


a backcountry skier with skis on her back hikes under a rocky ridge

Set yourself a new challenge. You never know what new terrain you might end up in. Photo: Robson Hatskukami Morgan via Unsplash

3. Set a Crazy Goal.

Maybe it’s skinning 30,000 feet of vertical gain over the season, or finishing a skimo race [[link to cripple creek race]]. Maybe it’s sending your favorite run in a prom dress. Regardless, it’ll motivate you to get outside your comfort zone. Here’s a great one to start with: “Ski every run on the mountain—you’ll be sure to find some surprises!” suggests Bluebird volunteer and Jill-of-all-trades Sara Higgins.

4. Get Out with Different Partners.

Life is just better with more adventure buddies. “Plan outings with friends of different abilities levels—people you can learn from and people you can teach,” says Bluebird partnership wrangler Laura Hansen. You’ll pick up a lot of tips from following a master’s lines. Conversely, teaching a newbie is a great way to refresh your own memory on the basics.

a group of backcountry skiers gathers on the mountain for a backcountry ski clinic

The best way to have fun? Hit the mountain with confidence.

5. Invest in Yourself with a Lesson or Course

There’s no getting around it: Sports are more fun when you know what you’re doing. So take a little cash out of your self-care budget and buy yourself a movement skills lesson and/or an avalanche course to boost your confidence on the mountain.

6. Start Tracking Your Backcountry Days.

Data nerds, this one’s for you. Try an app like Strava or Gaia GPS and start recording your mileage, vertical gain, and touring loops. Not techy? Just start counting your days out. If by March you find you’ve reached 9 backcountry days, you might just feel motivated enough to squeeze in an even 10. If not? That’s OK, too—you’ll have a great benchmark for any goal-setting next year.

7. Check the Avalanche Forecast Every Day.

You don’t need a new year to start making this one a habit. Checking the local avalanche forecast only takes a few minutes, and it can make a huge difference in your personal safety. And, of course, we recommend getting as much avalanche safety education as you can.


After all, the best way to truly guarantee a good backcountry day is to make sure you’re down safe in time for beers.

7 Snow-Day Rituals to Pray for Powder

Whether it’s wearing your pajamas inside out or tucking a spoon under your pillow, there are dozens of snow day rituals out there. While the scientific community hasn’t weighed in on exactly how effective these methods are, one thing is certain: You’re never too old to pray for snow.


Putting a spoon under your pillow is an old tradition to get a snow day.

The spoon-under-the-pillow trick is a classic snow day ritual. Photo: Dstudio BCN via Unsplash

1. Put a spoon under your pillow.

This is one of the older snow day rituals in the US, and it’s a common one throughout the East Coast. You can use a teaspoon or soup spoon—it doesn’t matter too much (Bluebird Backcountry Storytelling Lead Corey Buhay says she sometimes made do with a wooden spoon growing up in Georgia.) But why not throw in the whole cutlery drawer just to play it safe?

2. Wear your pajamas inside out.

This is another common East Coast tradition (some suspect it originated in New Jersey) and a tried-and-true method for coaxing enough snowfall to cancel school. Want to go the extra mile? Some recommend wearing your PJs both inside out and backwards.


Throwing ice cubes in the toilet is one folk method for ensuring a snow day.

Eh, just throw in a whole pitcher. Better safe than sorry. Photo: Tomas Listiak via Unsplash

3. Flush ice cubes down the toilet

This snow day ritual is a Midwestern classic. “Growing up in Ohio, our tried and true method was flushing ice cubes down the toilet and then doing a snow dance,” says Bluebird Ad Wrangler Erin Moeller. Some recommend flushing a cube for every inch you want. Some say a cube for every snow day. (Maybe flush 18 or so just to be sure?)

4. Do a Snow Dance

People have been dancing to manifest weather since time immemorial, but the American version of the snow dance may have its roots in Native American tradition. In fact, traditional dances have been followed by significant snowfall both in the Lake Tahoe region and in Vail, Colorado.


Putting a white crayon on a window sill is a classic snow day ritual.

When was the last time Junior actually used that white crayon, anyway? Photo: Kristin Brown via Unsplash


5. Put a white crayon in the freezer.

The crayon trick has some interesting regional variations. Some recommend leaving it in the freezer overnight, while others swear by tucking the crayon under your pillow just before bed. Others say you’ve got to put it on a windowsill. Regardless, we recommend waiting for the kids to fall asleep before pillaging their school supplies.

6. Stack coins on the windowsill.

Some folks swear by taping a quarter to the window or stacking pennies on your windowsill. We’re not sure where this one originated, but we like the quantitative component: Legend has it that you’ll get an inch of snow for every penny you stack.


Some say eating ice cream the night before will guarantee a snow day.

Ice cream is never a bad idea. Photo: American Heritage Chocolate via Unsplash

7. Eat ice cream the night before.

We had a hard time confirming the regional origin or the success rate for this snow day ritual. But what does it matter? We’ll always take another excuse to eat ice cream.

17 Must-Do Adventures Near Bluebird Backcountry

Nestled in the heart of the Colorado Rockies, Bluebird Backcountry sits between two adventure epicenters: Kremmling and Steamboat Springs. Take advantage of the prime location by sampling the full array of winter adventure, good food, and mountain town charm. To get you started, we put together this guide to the best things to do near Bluebird.

The Steamboat area is famous for deep pow and fun terrain. Photo: Sean Kelley via Unsplash

Adventures

The Colorado Rockies offer adventures of every shape and size. Round out your visit with these unforgettable outings.

1. Go ice climbing at Fish Creek Falls.

This 80-foot waterall just east of Steamboat Springs freezes in the winter, providing great introductory terrain for ice climbing. (Be sure to hire a local guide service if you’re new to the sport.)

2. Try Nordic skiing at Howelsen Hill.

America’s oldest operating ski area, Howelsen Hill in Steamboat Springs, provides free skiing on Sundays.

3. Go ice skating.

Howelsen Hill also offers free outdoor ice skating on its two tennis courts, which are converted into rinks in winter.

4. Soak in a hot spring.

Take a rest day to soak those sore muscles in the natural, spring-fed Strawberry Park Hot Springs or downtown Steamboat’s Old Town Hot Springs.

5. Keep skiing!

Colorado is a great place to ski, and ski-area hopping is an amazing way to get to know the state. Here are some of our favorites (other than Bluebird, of course):

  • Seamboat Resort: Steamboat is a great lift-accessed ski area with a lot of character. You can pay for a lift ticket, or splitboard or ski uphill at the resort as long as you go before or after operating hours and sign up for a $20 uphill season pass.
  • Local Backcountry: Experienced groups will also find plenty of unmitigated backcountry terrain to keep them busy. Try Buffalo Pass for easy to intermediate lines, or Hahn’s Peak for great views and some glade skiing.

Table 79 offers upscale fare in a mountain-meets-urban atmosphere. Photo: Table 79 Foodbar

Food & Drink

Mountain town eateries have tons of character (and amazing food, to boot.) These local brew-pubs, restaurants, and cafés offer Bluebird visitors some amazing deals.

For Date Night

Head to The Barley in Steamboat Springs for top-notch drinks in fun, laid-back digs. Sip Colorado craft beers on the patio, or get a round of beers and snacks to toast a backcountry day well-spent. Sweet perk: Bring your Bluebird day pass for BOGO drinks.

We also love Blue Valley Spirits for local craft vodka, whiskey, and gin. Then there’s Steamboat Whiskey Co., which provides all-day happy hour pricing with your Bluebird day pass or season pass (you can also grab a coin at the Bluebird base area lodge for a free whiskey tasting).

Bring your Bluebird pass for a free beverage at Aurum. Photo: Aurum Food & Wine

For Celebrations

When an occasion calls for a little extra flair, treat yourself to an elevated dining experience at Aurum Yurt or Table 79 Foodbar. Bonus: At Aurum, Bluebird day pass gets you a free house wine, draft beer, or well drink with the purchase of a small plate or app.

For Casual Family Dining

The Dean West restaurant in Kremmling is our go-to for hearty meals with easy-going atmosphere. Also check out partner establishment Grand Adventure Brewing for pub fare and an extensive tap of local brews. Bring your Bluebird passport for a free beer. (Get more than half the stamps? Make that two free beers.)

For Breakfast

Grab an omelet, homemade French toast, or a hot cup of coffee to fuel your ski day at Kremmling’s Moose Café. You can also grab a breakfast at the Bluebird base area—The Drunken Onion will be providing breakfast burritos on-site this season.)

For Groceries

Looking forward to a night in? Grab groceries from the locally owned general store, the Kremmling Mercantile. The ‘Merc has a lot of character and a great selection. (It’s where we source all our ingredients for Bluebird’s base-area food offerings, too!)

Head to Hotel Eastin for a cozy, quirky home away from home. Photo: Hotel Eastin

Lodging

Whether you’re looking for a cozy mountain cabin or a VRBO big enough for the whole family, these nearby lodging options have you covered.

Hotels

Check out the boutique Hotel Eastin for historic western digs. (Note: Some rooms share a hostel-style communal bathroom, which lets Hotel Eastin offer them at a very economical price point.) Hotel Eastin is about a half-hour’s drive from Bluebird Backcountry.

For a more traditional hotel experience, try Steamboat Hotel in Steamboat Springs, also about a 30-minute drive from Bluebird. Steamboat Hotel, Hotel Eastin, and the nearby Steamboat Mountain Lodge all offer 15% discounts to Bluebird day pass or season pass holders. Just mention Bluebird at checkout.

Cabins

If a cozy winter cabin is more your speed, we recommend booking a stay at the Muddy Creek Cabins. Each one has a kitchenette, wifi, and a gorgeous view of the surrounding valley.

VRBO

This lodge-style vacation rental sleeps up to 14 adults and offers discount for Bluebird skiers for stays two nights or longer (just email [email protected] and mention Bluebird). It’s located just north of Kremmling, about 35-minute drive from Bluebird Backcountry.

Backdoor Sports offers a great variety of gear—and some unique flair. Photo: Rahel Schneider

Shopping

Get your gear fix and expert fitting advice at one of these local shops.

  1. If you’re into thrifting: Check out Boomerang Sports Exchange in Steamboat Springs for a great selection of second-hand gear.
  2. If you’re driving from the Denver area: Be sure to stop by Two Pines Supply in Granby, Colorado, which sits right on the border of the breathtaking Rocky Mountain National Park.
  3. If you’re passing through Steamboat Springs: We recommend stopping in both Backdoor Sports and One Stop Ski Shop, both of which offer unbeatable customer service and quality ski and splitboard gear. Keep an eye out for Honey Stinger snacks and Big Agnes camping equipment—both are local brands, born and bred in Steamboat.

The Best Backcountry Touring Snacks of All Time

There’s one thing we and your dentist can agree on: Nothing is worse than biting into a frozen protein bar. Sure, you can try to warm it up in your pocket, or chip off flakes with a knife. But somehow, that just doesn’t sound as good as say, homemade banana bread or a family-size pepperoni pizza.

To help you level-up your winter snacking game, we polled the whole Bluebird Backcountry squad—a team of seasoned patrollers, skiers, splitboarders, and all-around winter adventurers. Here are the results.

Warm banana bread with a little butter.

Bonus points if you bring enough to share. Photo: Priscilla Du Preez

1. Banana Bread

It’s delicious and freeze-proof, and bananas and chocolate chips provide a blood-sugar lift without being overly sweet. “This was my go-to for mega-cold ice climbing days before I started skiing. It’s still the best winter snack there is,” says our storytelling lead Corey Buhay.

2. Poptarts

They’re great pocket-temperature, and even better frozen. Plus, the added nostalgia points keep these high on our list of classics.

A volunteer cooks bacon at the Bluebird Backcountry ski area.

We’ll be serving up free bacon at Bluebird Backcountry all season long. Photo: Doug McLennon

3. Pocket Bacon

Crunchy. Salty. Oh, so perfect. Don’t have time to make yourself a pound of hickory-smoked before your ski day? We’ve got you covered. Head to Bluebird’s Perch warming hut, where we’ll be serving bacon strips hot and fresh off the grill all day, every day.

4. Cinnamon Raisin Bagel with Cream Cheese

This sweet, creamy classic is an easy make-ahead meal that always hits the spot. It’s a freeze-proof winter snack, and bagels have natural structural integrity: “It doesn’t get smooshed in your pack like a sandwich,” says Bluebird Planning Squad Member Doug McLennan.

Breakfast burritos make a great winter snack for adventures on skis.

Breakfast, lunch—when you’re backcountry skiing of splitboarding, it’s always a good time for a burrito. Photo: Rob McLennon

5. Breakfast Burritos

Make two in the morning, and you’ll have both a hot breakfast and a perfect, high-protein lunch. “They’re still delicious, even if slightly chilly from riding in your pack,” says Bluebird marketing guru Emma Walker of her go-to winter snack.

6. Full-fat Trail Mix

This is an easy recipe: Coconut flakes, cashews, and dark chocolate chips. It’s all the best parts of trail mix, but with none of the tooth-breakers. Plus, the high-fat content of the ingredients means they’re relatively lightweight, high-calorie, and ideally suited to providing all-day fuel on the mountain.

pepperoni pizza as an ideal snack for backcountry skiing and splitboarding

Whats better than hot pizza? Cold pizza after 1,000 feet of vertical gain. Photo: Amirali Mirhashemian

7. Cold Pizza

Step one: Buy a large pepperoni pizza the night before your backcountry ski or splitboard day. Step two: Fold it into quarters and stuff it into a gallon zip-top bag. Step three: Enjoy your favorite food, all day long.

8. Salted Baked Potato

It’s tough to replenish electrolytes on the mountain, especially when you’re not in the mood for goos or gummies. Our fix: Throw a few small potatoes in the oven when you wake up. Right as you’re walking out the door, pull them out, roll them in salt, wrap them in tin foil, and stick them in your pockets. “A friend of mine once pulled one out during an adventure race, still warm—it was amazing,” says Bluebird team member Rob McLennan.

9. Toasted Banana Peanut-Butter Sandwich

Almost like the classic PB&J, but way more elevated. Well-toasted bread provides a satisfying crunch come lunchtime, and the natural sugars and fiber from the banana will keep you energized during those final laps.

Bring hot soup in a thermos for your next backcountry ski tour.

Bonus: You can drink the broth. Photo: Jonas Jacobsson

10. Hot Soup in a Thermos

In the morning, throw some ramen noodles into hot broth and seal tight (we like fancy ramen and those KeenOne quinoa cups, which is why we convinced the Bluebird Snack Yurt to offer our flavors.) By lunch, they’ll be soft enough to slurp, and you’ll have a hot, hydrating meal.

11. A Flask of Maple Syrup

Don’t knock it until you try it. A quick hit of Grade A maple syrup brings you right out of a low blood-sugar bonk. “Never leave home without it,” says rental gear fleetmaster Brock Nelson.

12. Hot Coffee

Coffee is a food, right? Bring a thermos in the morning to keep you warm and energized. (If you forget to fill up, grab Alpine Start or Wild Barn Cold Brew at the Bluebird base area to get your caffeine fix.)

13. Whitney’s Famous Power Balls

These bite-sized morsels have everything you need for a day of hard charging. Whitney Bradberry, Bluebird’s social media extraordinaire, was generous enough to share her special recipe:

INGREDIENTS

  • 1 cup honey
  • 1 cup unsweetened peanut butter
  • 3 cups rolled oats
  • Flax seeds (ground or whole), to taste
  • Dark chocolate chips, to taste
  • Dried cranberries or pomegranate seeds, to taste

INSTRUCTIONS

  • Combine ingredients in a large bowl until the mixture is wet enough to form clumps. (If too sticky, add more oats)
  • Roll into balls with your hands. Let chill in the fridge.
  • Pack a few into a zip-top bag and throw into your pack the morning before your backcountry ski touring or splitboarding outing

10 Reasons to Start Backcountry Skiing or Splitboarding

Backcountry skiing and splitboarding are having a moment, but plenty of adventurous folks are still on the fence about giving it a try. Maybe that describes you. Maybe it describes a friend or partner you’re trying to convince. Either way, we made this list to help you take the plunge.

1. It’s better than snowshoeing.

Ok, we’re a little biased, but backcountry touring is definitely cooler than post-holing in snowshoes. Skinning on AT skis or a splitboard is the most efficient way to cover distance over deep snow.

2. You can do it anywhere.

No need to drive hours to the nearest resort. Once you learn to tour safely, any mountain can be your playground. (Brand new? Bluebird Backcountry is a great place to practice backcountry skiing or splitboarding in a more controlled environment.)

3. It’s great exercise.

Legs, arms, core—touring is basically nature’s elliptical. Plus, just think how good that burger will taste when you’ve been charging uphill all day.

4. It’s better for the environment.

It’s easy math: Ski lifts run on fossil fuels; your legs run on burritos. The latter produce a lot less greenhouse gas. (We can’t speak to the other kind of gas, though.) Backcountry touring is one easy way to reduce your impact as a skier or snowboarder.


Four backcountry skiers explore the mountain terrain of Bluebird Backcountry.

Skiers explore the terrain of Bluebird Backcountry. No lifts, no lift lines…dreamy, right? Photo: Whitney Bradberry

5. You won’t get cold.

Ever stripped down to your T-shirt on a lift? We didn’t think so. While resorts have you sitting still and cooling off between runs, skinning uphill keeps you moving at a steady pace and staying toasty all day long.

6. Backcountry skiing and splitboarding are easy to learn.

The backcountry does have a learning curve, but most of it is getting a feel for ungroomed snow and understanding avalanche safety (which you can learn in beginner-friendly backcountry education programs). The actual motion of skinning? It’s as simple as walking—just way more fun.

7. You’ll save money.

Yes, getting the appropriate backcountry setup and avalanche safety education can be expensive. But the lifetime savings of not having to buy a big resort pass—or overpriced resort food—more than makes up for the initial investment.


A group of backcountry skiers and splitboarders take in a snowy mountain view.

Backcountry skiing and splitboarding = finding gorgeous views with your best buds. Photo: Whitney Bradberry

8. It opens up new objectives.

Maybe you’re not sure about backcountry skiing or splitboarding because you’ve already got your winter “thing.” Maybe it’s ice climbing, winter camping, photography, or even alpine ice skating. Learn to backcountry ski, and you’ll be able to reach cooler campsites, more ice, and better views with one of the most efficient modes of winter travel around.

9. You’ll experience the soul of winter.

Resorts can be loud and crowded. At times, they feel artificial. Backcountry touring lets you access the quiet peace of nature under snow—something that can be tougher to find at resorts.

10. The turns are way sweeter.

Learn to backcountry ski or splitboard, and you won’t have to fight for first chair to get first tracks. Plus, when you’ve worked hard to gain a ridge or summit, you appreciate every turn so much more.